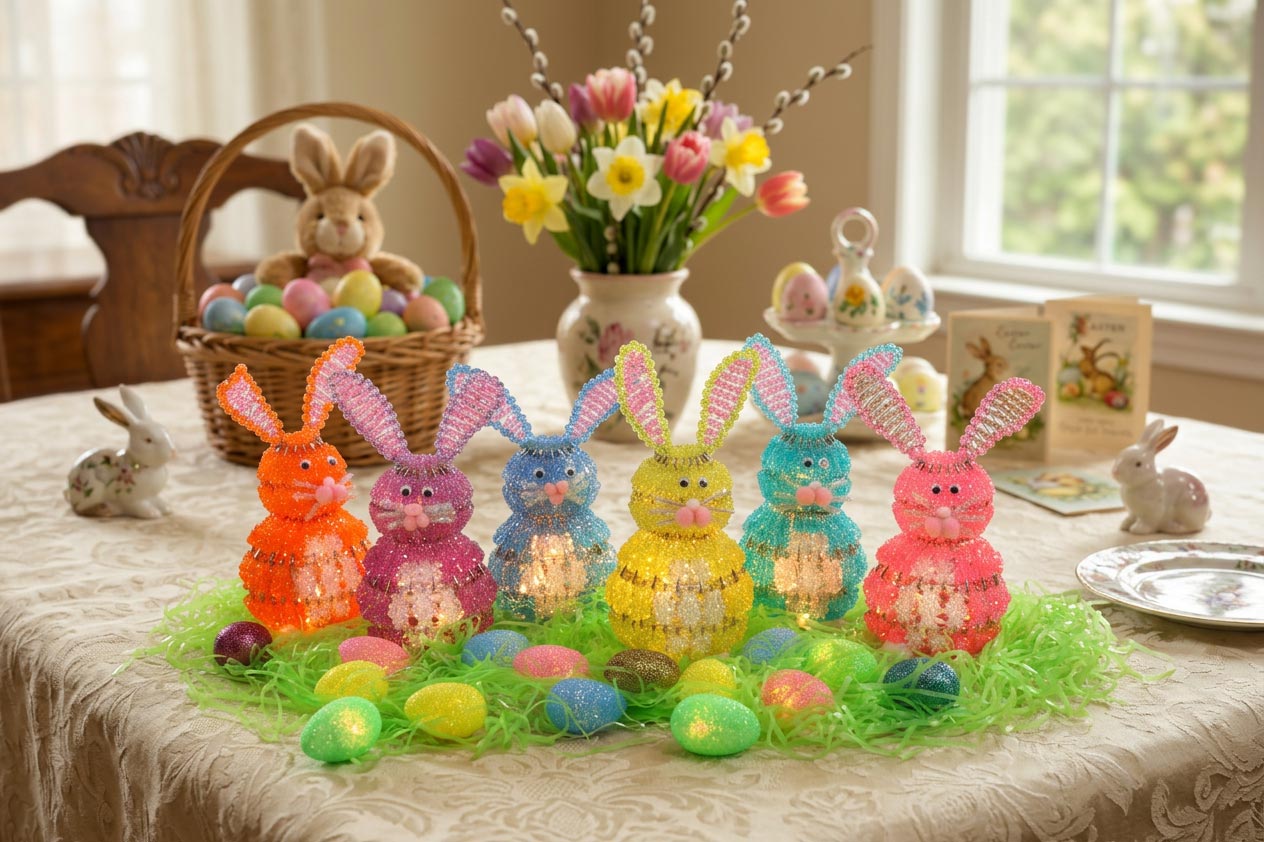
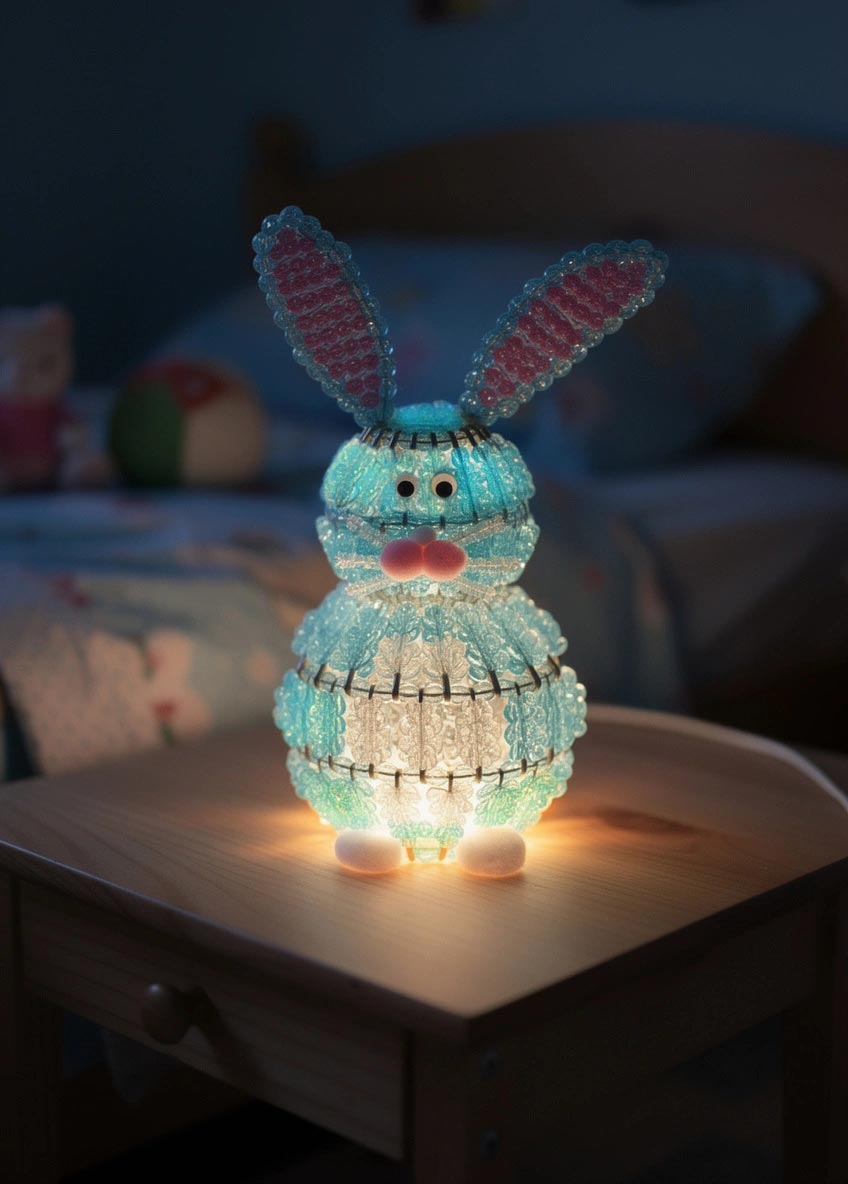
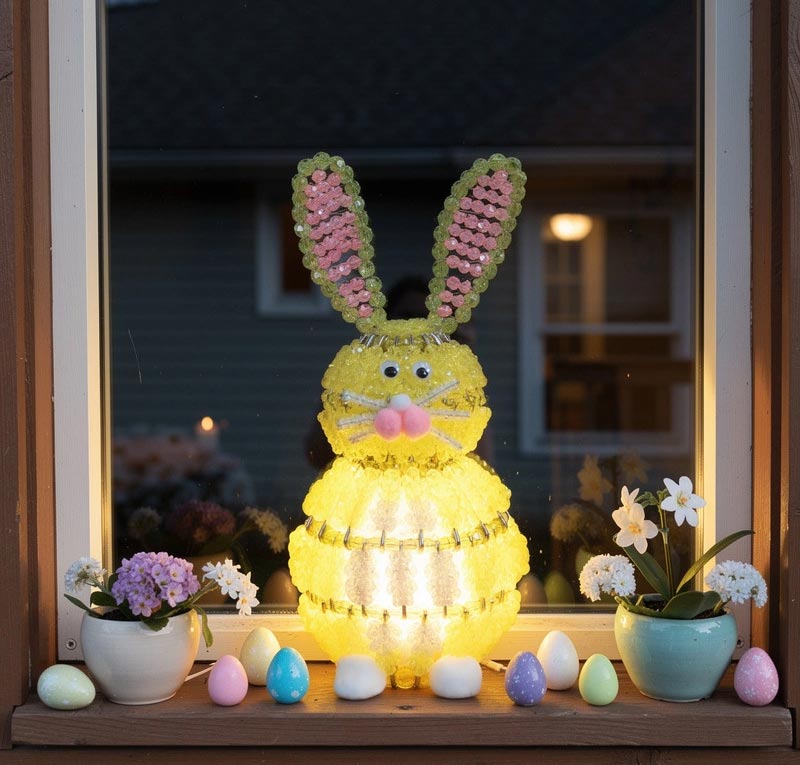
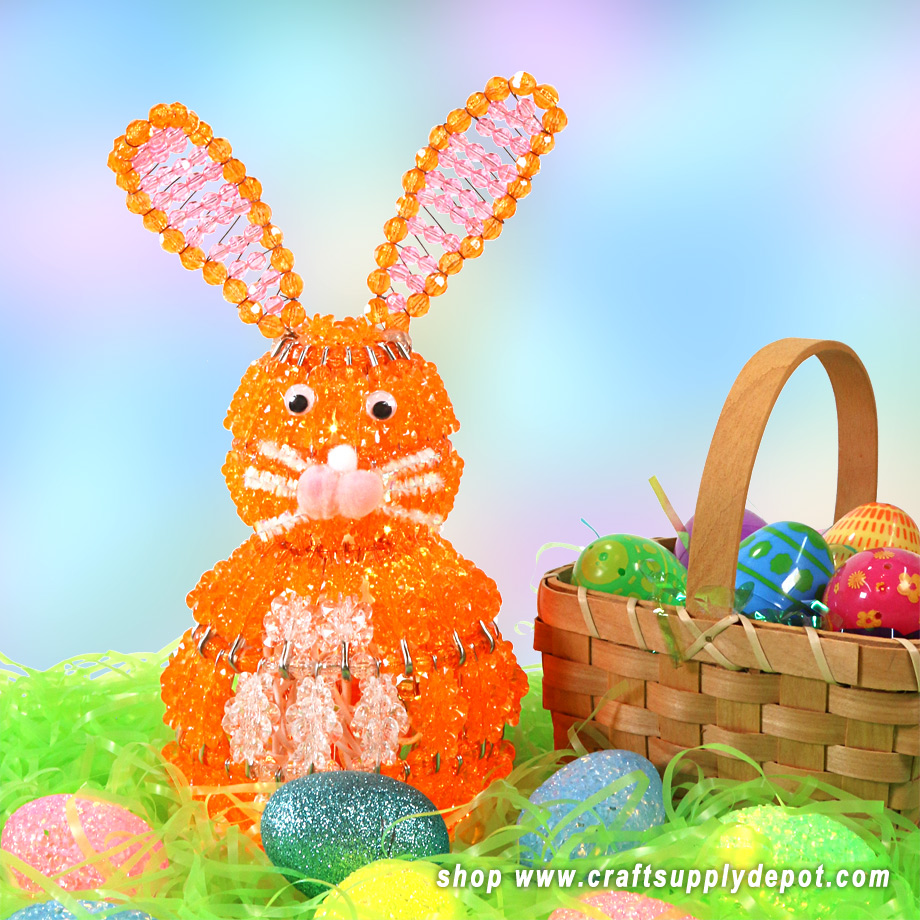
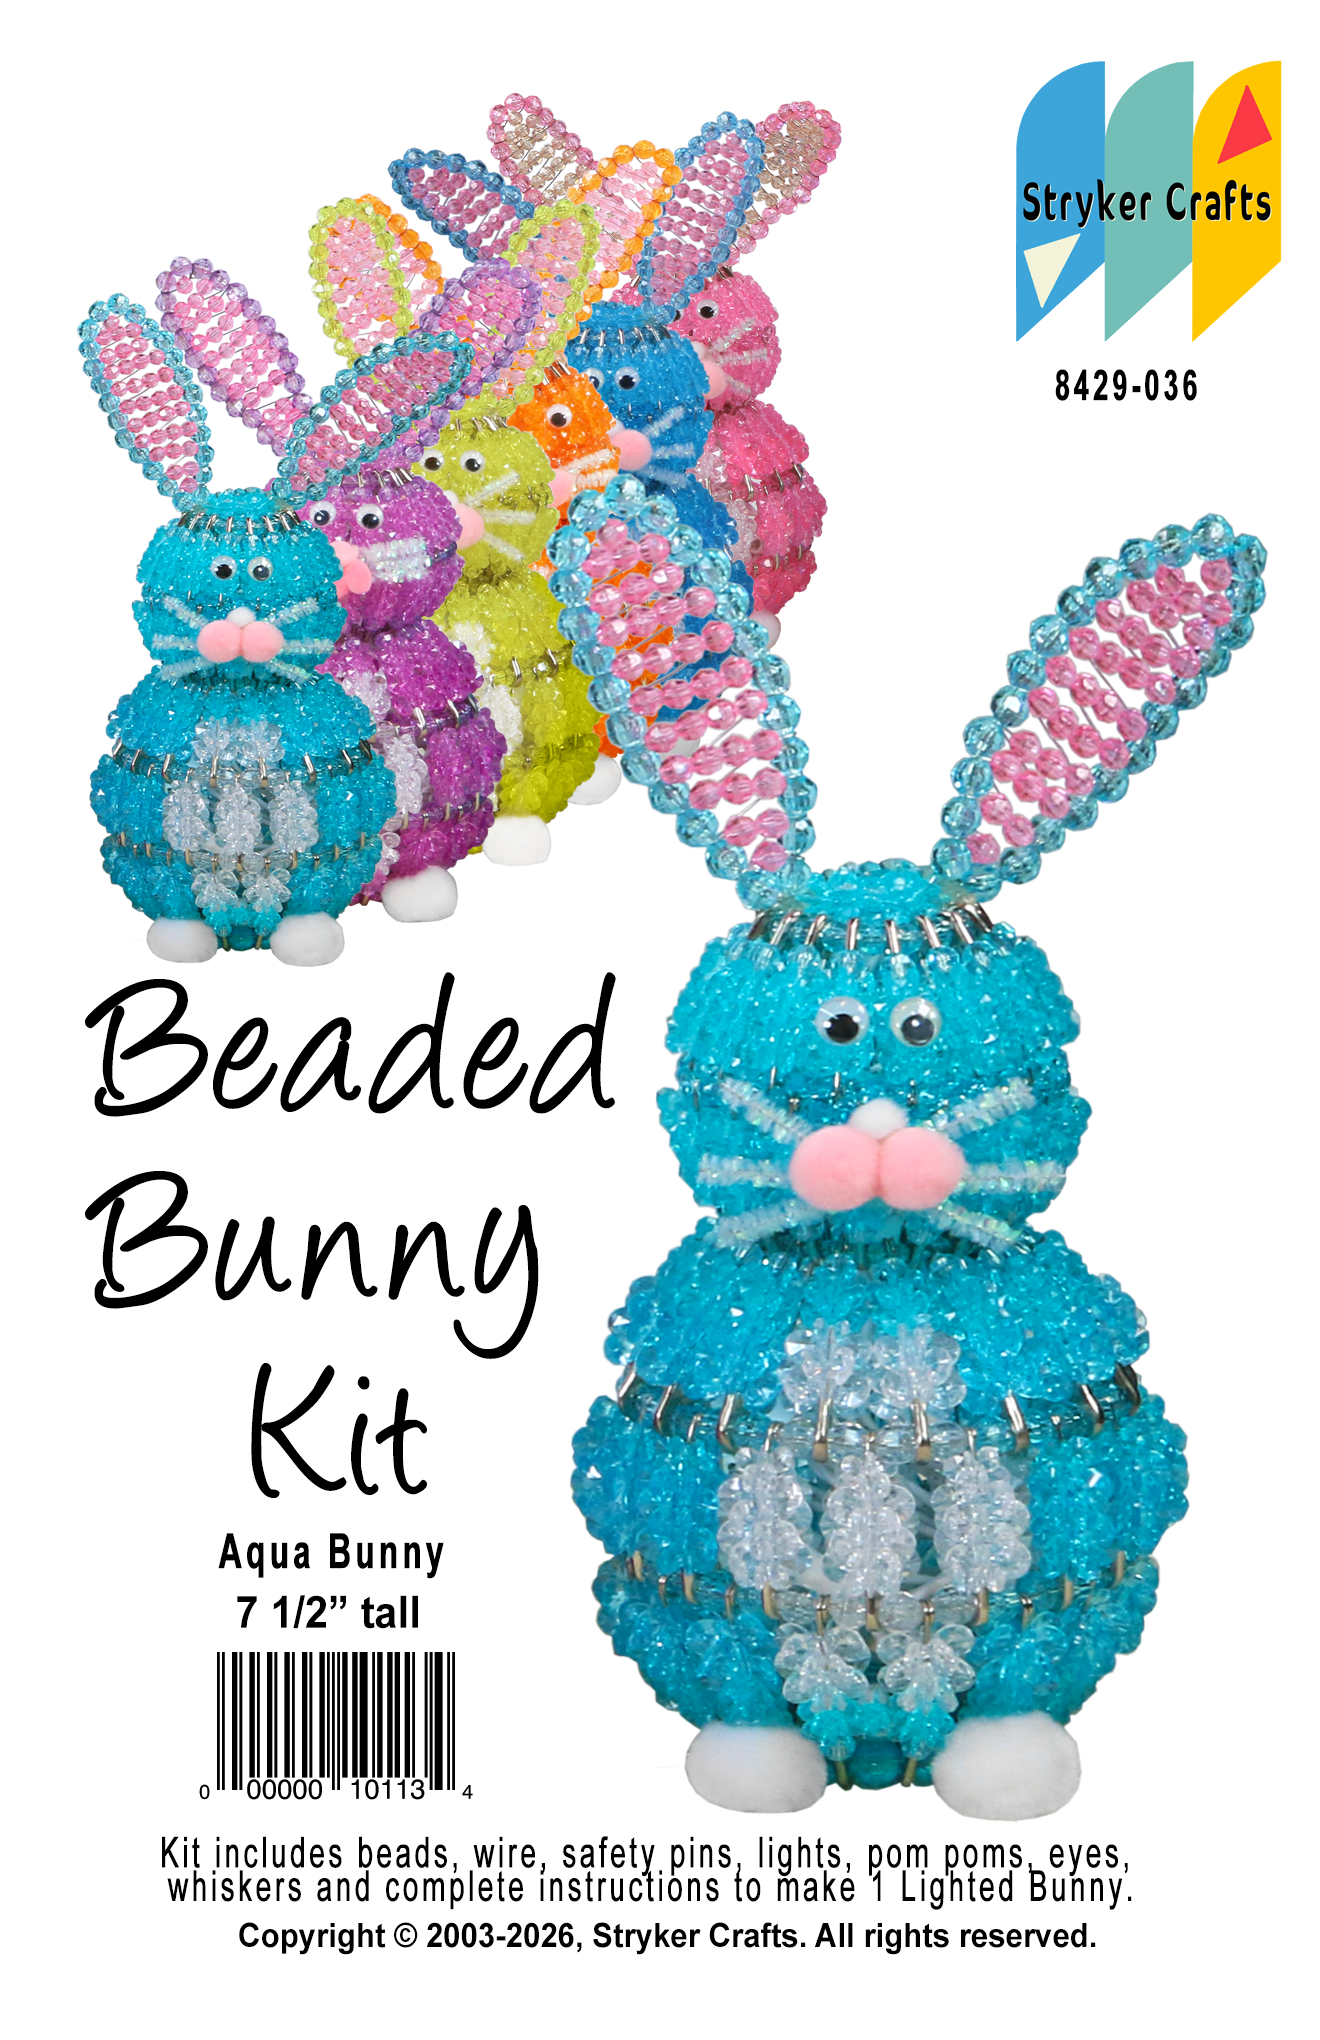
Whether you're a seasoned crafter or a first 'timer looking for a fun, satisfying activity, we found a craft that comes in a kit that has everything you need to create a charming, 7 1/4 inch tall, 4 1/4 inch wide bunny that doubles as a night-light, decor piece, and conversation starter. Let's dive into why this kit is a spring-time must-have, what's inside, and how you can have your bunny hopping in just a few hours.
Why We Feel This Kit Wins the Spring Decoration Game
First, and most importantly, everything is all in one package! That means no searching through all of your crafts stashes looking for this or that and no frantic trips to the craft store. Beads, safety pins, wire, eyes, pom poms, pipe cleaners, and a mini light string are all pre-counted and ready to go.
Second, it is kid friendly. If you want to include the kids in this craft they'll have as much fun as you do. The components are lightweight and non toxic. Kids have fun stringing the beads onto the safety pins.
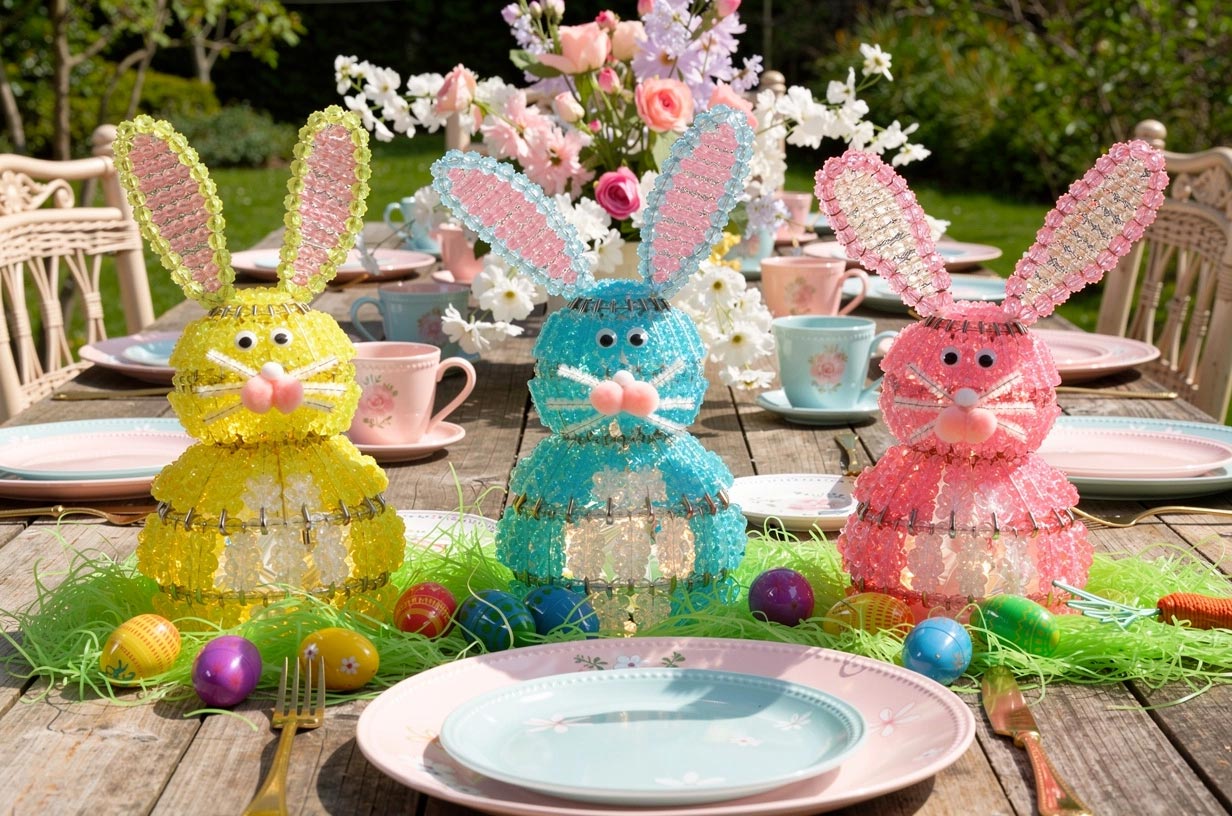
Place it on the Easter dinner table, on the kids' bedroom nightstand, or a hallway mantle for an instant pop of pastel glow.
Simple steps, safe materials, and a satisfying result for crafters of all ages.
A radiant bunny that instantly brightens any Easter or spring gathering.
Most families finish the bunny in just a couple of hours, making it great for a rainy Saturday or as a pre-Easter craft sprint.
It is reusable again and again! Your beaded bunny is strong and durable and the beads don't lose their colors over time. It will look just as lovable in year 10 as it does the minute you plug it in.
What's Inside the Package?
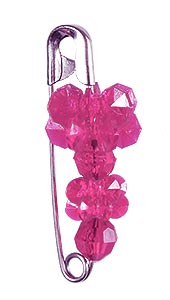
- Assorted beads - Used throughout your project. There are several sizes of faceted and starflake beads, and some colors include tri beads. The size is labeled on each package so there is never any confusion about which bead you are instructed to use.
- Safety pins - The safety pins are the "bones" of your bunny. You will add beads to the pins using the instructions. It will tell you which size pin to use and which beads to add to the pins.
- Craft Wire - There are 2 different gauges (sizes) of wire included. One is thicker and stronger and the other is a thinner, more pliable wire that gets used on the ears. The heavier wire is used to thread beaded safety pins and beads onto to form your bunny's body.
- Plastic Googly Eyes - Give your bunny its sweet, expressive stare.
- Pom Poms - All you need to bring your bunny to life with cute little cheeks and mouth, feet, and a fluffy tail.
- Pipe Cleaners - Use these to form your bunny's whiskers.
- Mini Light String - A light string is provided in the kit to insert inside your bunny to give him a warm glow.
- Detailed instructions - We found these instructions to be well written and include plenty of photos and illustrations to help you along the way.
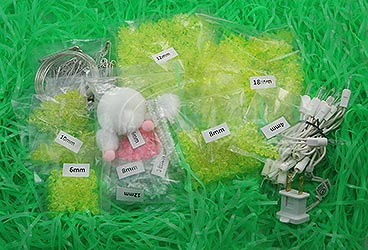 Kit Contents
What's Not Inside the Package?
The only thing you will need is a few tools to create your bunny friend. Here's the list we came up with.
- Jewelry pliers - You will use these to twist the wire closed at the end of each row.
- Small wire cutters or utility scissors - These are needed to cut your wire to the specified lengths for each step of the pattern.
- Ruler or tape measure - The instructions tell you what length of wire you will need for each row or step.
- Hot glue gun - The bunny is made in 4 pieces, the 2 ears, the closure on top of the head and the body itself. Hot glue helps secure these into permanent position. You will also need a dab of hot glue to add Bunny's facial features, feet and fluffy tail.
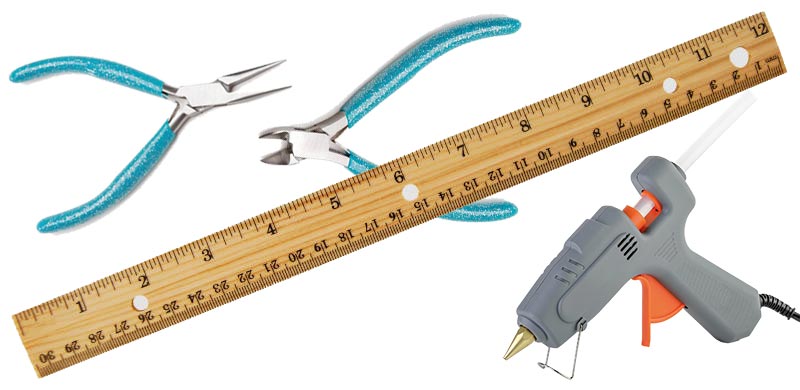
Tools you will need.
Everything else is neatly packaged and marked, making setup a breeze: open the kit, lay out the pieces, and you're ready to start beading.
Step by Step: From Kit to Hopping Hero
Below is a concise version of the instructions, feel free to skim or go deep, whichever suits your pace.

Pink Beaded Bunny
- Prepare your Safety Pins
- The instructions tell you which size safety pin to use and which beads to add to your safety pin.
- You will want to prepare all of your safety pin assemblies first so that you will be ready to assemble your bunny.
Start Building Rows
- Each row uses a different length of wire. The instructions will tell you how much wire you need for each row.
- Next, you will add the specified amount of safety pins and beads directly onto the wire, in the order shown in your instructions.
- Twist the ends together to form your first row.
- Repeat these steps for each row. There are 6 rows in total for the body.
- As you are closing your last row you will add the lights. Coil the mini string around the interior of the bunny.
Make the Ears
- Cut your wire to the specified length and string on the beads. There are plenty of diagrams and illustrations to help you.
- Twist the ends to close your ear frame. There are plenty of photos to help.
- Next, you add the filler beads to finish your bunny's ear. (More photos provided to help.)
Create the Head Closure
- Cut your wire according to instructions and thread on the beads as explained.
- Attach your ears and head closure to your bunny and bend them to suit your preferences. You can leave both straight up or bend one down a little to resemble a floppy ear.
Add the Face Details
- Lay your bunny face out on the table to decide how you prefer they look.
- Once you are pleased with the way they look you will attach them to your bunny's head with hot glue.
Add the Feet and Tail
- Stand your bunny on a flat surface and test fit the location for his tail and feet.
- Hot glue them into place.
Display Proudly
- Place the bunny on a centerpiece tray, in an Easter basket, a dinner table runner, a child's room, or a nightstand.
- Plug your bunny up and enjoy the gentle, soothing glow.
Decorating Ideas: Make the Bunny the Star of Your Spring
- Easter Basket Decorations Place an Easter bunny in the center of your child's basket and add eggs and candy all around it.
- Easter Table Centerpiece Surround your bunny with grass, dyed eggs, pastel candles, fresh spring flowers, or tiny egg filled nests for a cohesive look.
- Night Light for Little Dreamers Place the bunny on a child's bedside table; the soft glow is perfect for easing bedtime anxieties.
- Window Silhouette Set the bunny on a windowsill; the backlit glow creates a whimsical silhouette against the daylight.
- Garden Party Accents Set a few bunnies on outdoor tables for a fairytale Easter brunch.
A Few Frequently Asked Questions
Q: Do I need any special tools?
A: A few. A ruler, jewelry pliers, utility scissors or jewelry wire cutter, hot glue and a flat surface to work on.
Q: Can I use battery operated lights instead?
A: Yes, but the lights provided are electric so you will need to buy them separately.
Q: Can I swap beads for a different color scheme?
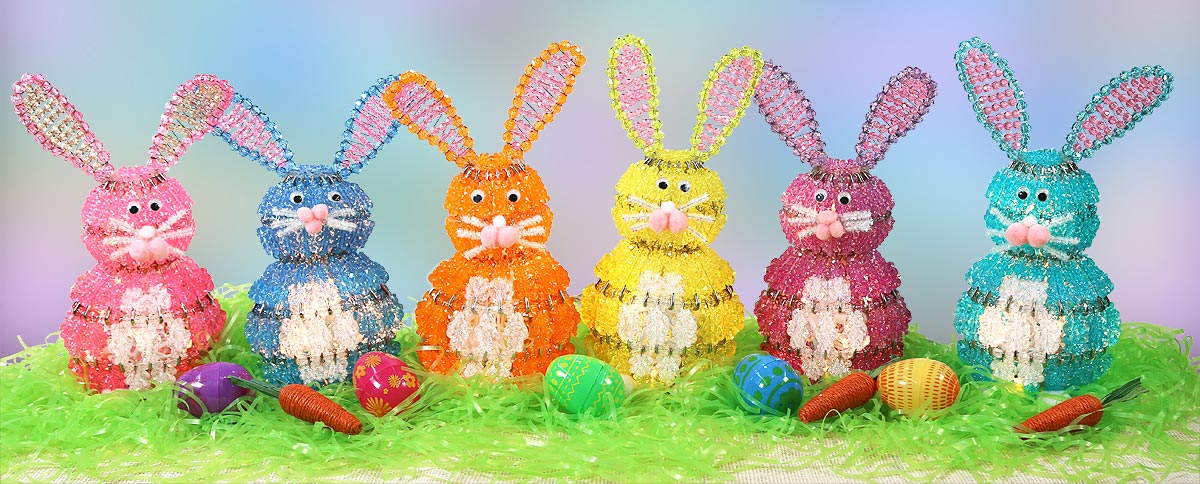
A: Absolutely! There are 6 different colors already available but you could go outside the box and create one made of any color you like.
Q: Is the bunny sturdy enough for a pet's curiosity?
A: Yes. This bunny is very durable! Even if your pet knocks it over the most you will need to do is straighten (or rebend) an ear
Wrap-Up: Why You'll Love This Kit
Spring is all about renewal, color, and the joy of gathering. The Lighted Beaded Easter Bunny Kit captures those feelings in a single, hands-on activity that:
- Boosts family together time with a project that's quick, manageable, and rewarding.
|
 |
- Adds a unique, glowing decor piece that you won't find in any store.
|
- Encourages creativity the kit is a base, but you're free to remix colors and accessories to make your bunny your unique own.
|
And when the bunny finally sits on your table, bathed in a soft pastel glow, you'll feel a little spark of the magic that makes Easter and spring so special.
Ready to hop into the project? Grab your kit, gather the family, and let the light (and laughter) shine!
Happy crafting, and may your Easter be as bright as your new beaded bunny.
Customer Voices
"My kids were thrilled! The bunny lit up the whole dinner table and became the conversation starter at our Easter brunch." - Sarah L., Ohio
"The instructions were crystal clear, and the final product looks far more professional than I expected from a DIY kit." - Mark T., Texas
"I've used it as a night light for my daughter's room for a soft glow, no heat, and the perfect Easter themed decor." - Emily R., California
(Add your own review here!)
Bring Light to Your Spring Celebration
Ready to brighten your home and create lasting memories? Click on over and choose your favorite color and start crafting a radiant Easter bunny that will delight family, friends, and guests alike.
Keywords: DIY Easter craft kit, lighted beaded bunny, spring decor, family craft activity, night-light bunny, Easter table centerpiece, bead art kit, easy Easter project, DIY easter crafts.


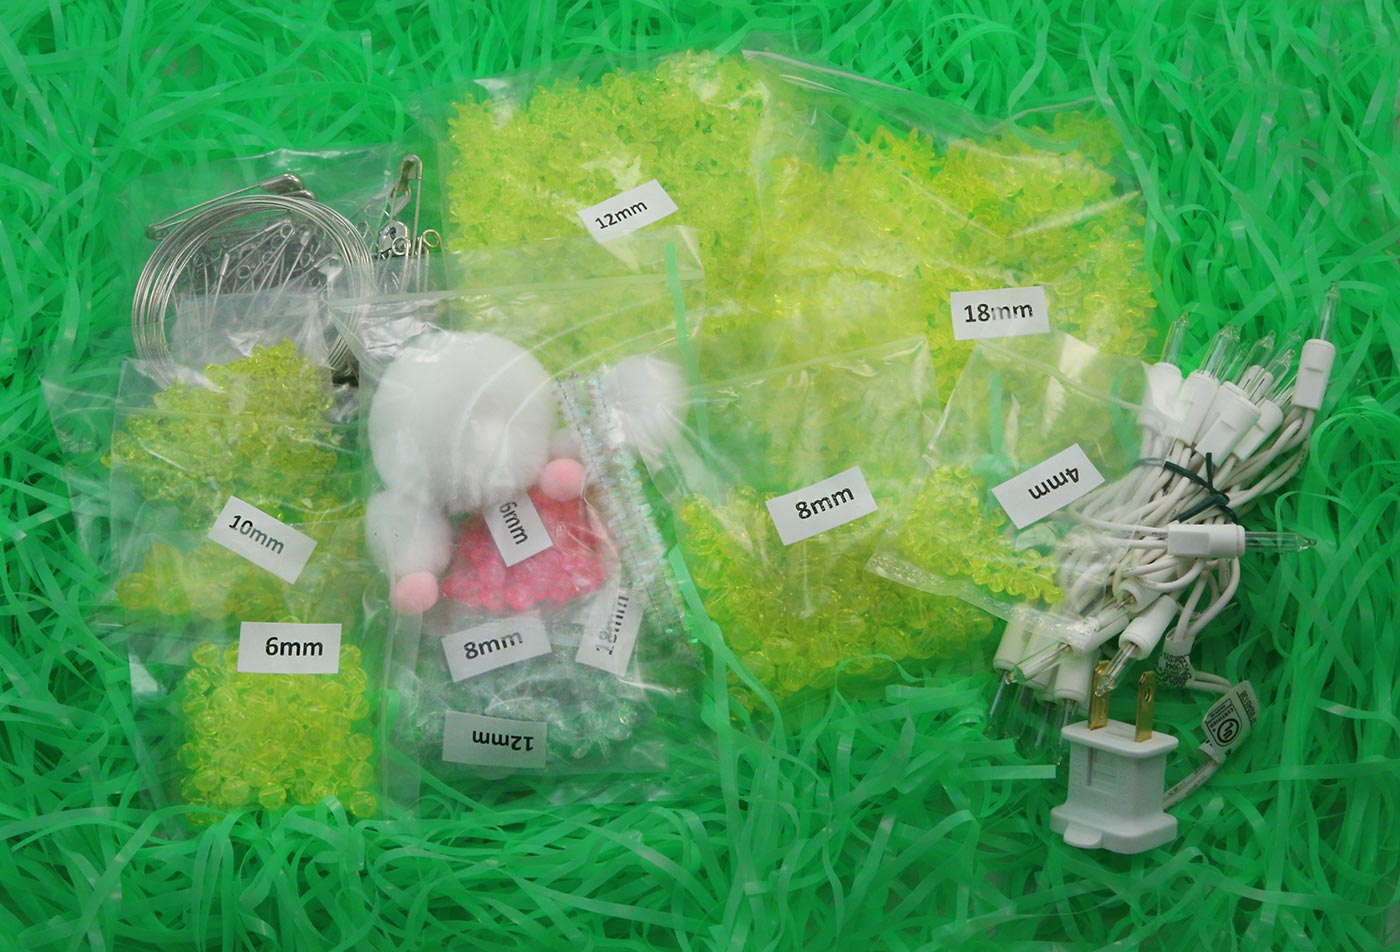 Kit Contents